
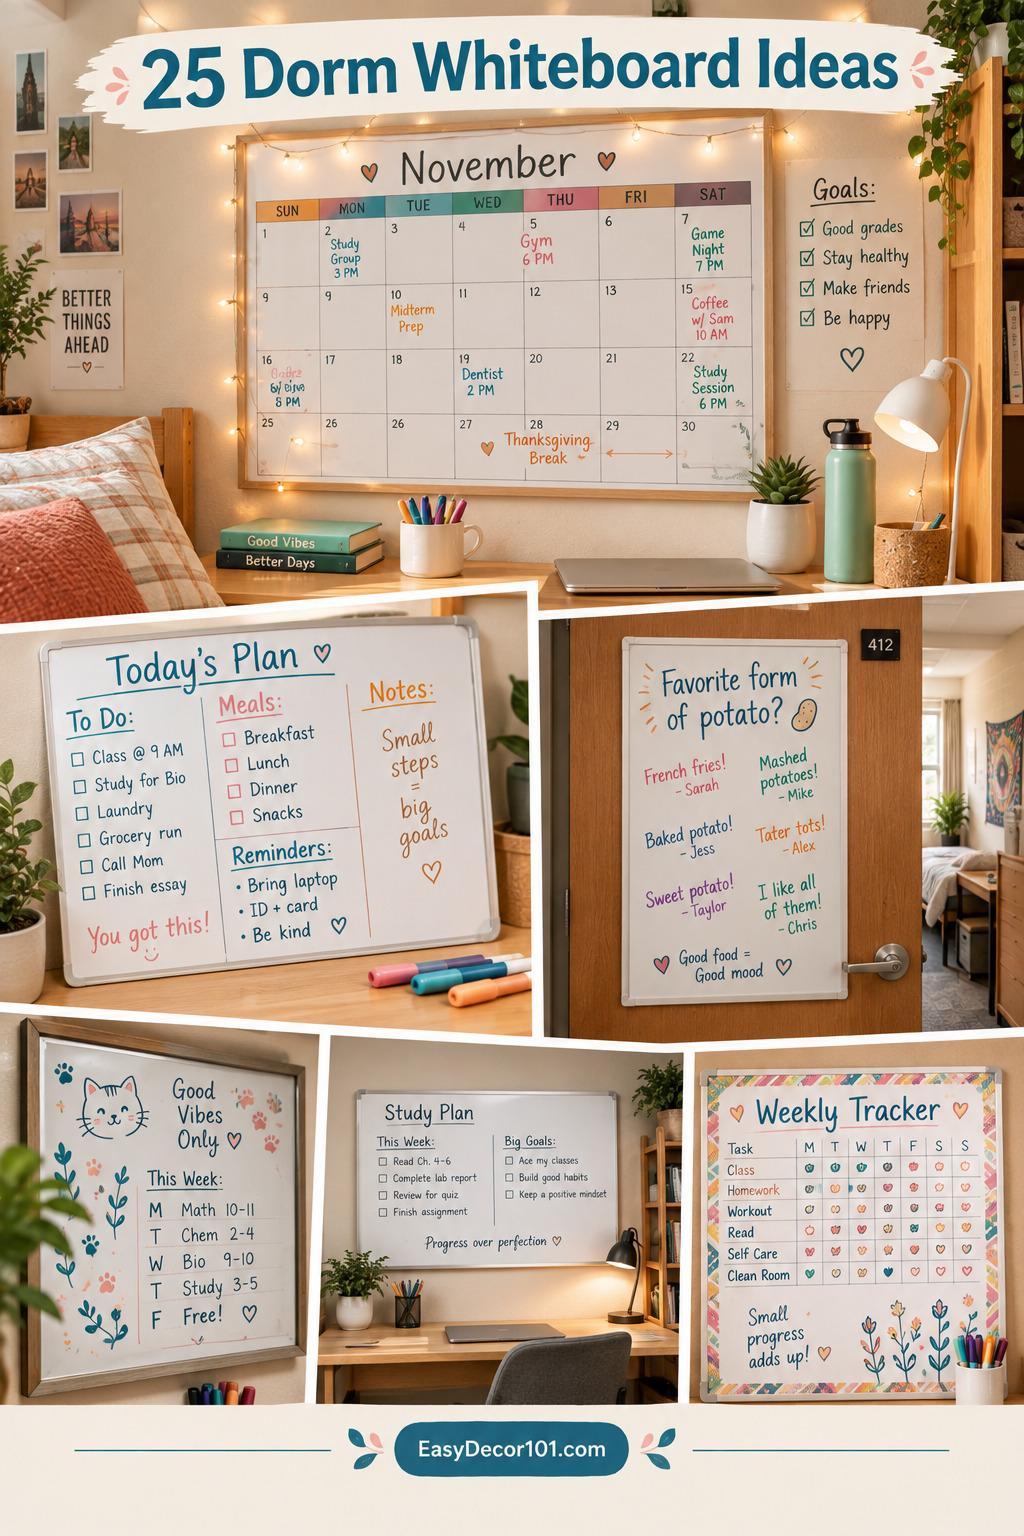
Your dorm room whiteboard is about to become your secret weapon for staying organized, motivated, and actually enjoying your college space. Whether you’re moving into your freshman dorm or refreshing your setup for a new semester, the right whiteboard layout can transform a tiny room into a functional command center that keeps you on track without adding visual chaos.
The best dorm whiteboard ideas balance aesthetics with function—think color-coded calendars that actually make you want to check your schedule, study planners that fit your workflow, and cute decorative elements that make your space feel like home. From minimalist setups to colorful layouts filled with doodles and motivational quotes, there’s a whiteboard style that matches your personality and helps you tackle college life with confidence.
In this guide, you’ll discover 25 real dorm whiteboard setups that college students are loving right now. You’ll see everything from weekly planners and class schedules to creative door whiteboards that spark conversations with neighbors. Each idea includes practical tips for adapting it to your space, budget, and organizational needs—so you can create a whiteboard system that actually works for your unique situation.
Quick Start: Choose Your Whiteboard Style
Before diving into all 25 ideas, here’s a quick way to narrow down what might work best for your dorm:
For Maximum Organization: Go with a calendar-focused layout that includes your class schedule, assignment due dates, and important deadlines. Color-code by class or priority level.
For Small Spaces: Choose a vertical layout or door-mounted whiteboard that uses often-wasted space. Look for slim, frameless designs that don’t overwhelm tight walls.
For Visual Appeal: Mix functional elements (like your schedule) with aesthetic touches—think soft color palettes, cute washi tape borders, fairy lights, or polaroid photos pinned around the board.
For Social Dorms: Try an interactive door whiteboard with fun questions, roommate messages, or a “would you rather” section that encourages hallway conversations.
For Budget-Conscious Students: Start with a basic whiteboard and use colored markers you already have. Add personality with free printables, hand-drawn doodles, or decorative elements from around your room.
Why Dorm Whiteboards Actually Matter
College life throws a lot at you—multiple class schedules, assignment deadlines, social events, work shifts, and maybe even club meetings. Without a visual system, it’s easy to let things slip through the cracks. A whiteboard gives you an at-a-glance view of what’s happening, which reduces stress and helps you plan your time more effectively.
But beyond pure function, your dorm whiteboard serves another important purpose: it’s one of the few ways to personalize a space that often feels temporary and institutional. Unlike permanent decor changes, a whiteboard is completely flexible. You can change it weekly, redecorate it each semester, or completely reinvent it when your needs shift. This makes it perfect for renters and students who can’t paint walls or make major modifications.
The best part? A well-designed whiteboard setup doesn’t have to break the bank or require design expertise. With the right layout and a few strategic choices about color, spacing, and organization, you can create something that looks polished and professional—even if you’re working with a basic $15 whiteboard from the campus bookstore.
Essential Elements of a Great Dorm Whiteboard
While every whiteboard is different, the most effective dorm setups tend to include a few key components:
1. Your Class Schedule
This is non-negotiable. Whether you create a weekly grid or simply list your classes by day and time, having your schedule visible prevents double-booking and helps you plan study sessions around your actual availability.
2. Assignment & Exam Tracker
Deadlines sneak up fast in college. Dedicate a section of your board to upcoming assignments, tests, and projects. Update it weekly and use different colors to indicate urgency or class.
3. To-Do List or Task Management
This could be a daily list, a weekly overview, or a running list of things you need to accomplish. The key is making it visible enough that you actually use it.
4. Personal Touches
This is what separates a boring office whiteboard from a dorm whiteboard. Add motivational quotes, doodles, photos, stickers, or decorative borders that make you smile when you look at your board.
5. Flexible Space
Leave some blank area for spontaneous notes, reminders, or temporary information. Your needs will change throughout the semester, and having adaptable space prevents your board from feeling too rigid.
Small Space Whiteboard Strategies
Dorm rooms are notoriously tiny, which means every inch counts. Here’s how to maximize your whiteboard impact without overwhelming your space:
Go Vertical: Instead of spreading horizontally across a wall, stack information vertically. This works especially well on doors or narrow wall sections between furniture.
Use Both Sides: If you have a freestanding whiteboard or can mount one where both sides are accessible, you essentially double your space. Use one side for your schedule and the other for to-do lists or notes.
Layer Information: Use different colored markers to layer information in the same space. For example, write your regular schedule in black, then overlay exam dates in red, and social events in blue.
Combine Functions: Instead of separate sections for everything, combine related items. Your class schedule can also show when you plan to study for each class, for instance.
Think Modular: Use smaller whiteboards or whiteboard stickers in different areas—one by your desk for daily tasks, one on your door for messages, one above your bed for motivational quotes.
Color Psychology for Dorm Whiteboards
The colors you choose aren’t just about aesthetics—they can actually impact how you use your whiteboard and how you feel when you look at it:
Blue and Green: These calming colors work well for study schedules and task lists. They promote focus and reduce anxiety about overwhelming workloads.
Pink and Coral: Warm, energizing tones that add personality and make your board feel more inviting. Great for motivational quotes and social planning.
Black or Charcoal: Creates strong contrast and a modern, sophisticated look. Works well if you want your whiteboard to feel more like intentional decor than a school supply.
Pastel Palettes: Soft pinks, blues, lavenders, and mint greens create a cohesive, aesthetic look that’s very popular on college campuses right now. These colors feel gentle and approachable.
High-Contrast Combinations: If readability is your top priority, stick with dark colors on white backgrounds. Save decorative colors for accents and borders.
Budget-Friendly Whiteboard Hacks
You don’t need expensive supplies to create an amazing dorm whiteboard. Here are some money-saving strategies:
DIY Whiteboard: Frame a piece of white shower board or melamine from the hardware store for a fraction of the cost of a traditional whiteboard.
Whiteboard Paint: Paint an entire wall section or the back of your door with whiteboard paint for maximum space without buying a physical board.
Clear Acrylic Boards: These often cost less than framed whiteboards and create a modern, floating look. Mount them with command strips to avoid damaging dorm walls.
Repurpose What You Have: Use washi tape from your craft supplies, borrow markers from roommates, or print free decorative elements instead of buying stickers.
Start Small: Begin with a basic $10-15 whiteboard and upgrade later if needed. You might find that a simple setup works perfectly for your needs.
Seasonal & Semester Updates
Your whiteboard shouldn’t stay static all year. Plan to refresh it:
Beginning of Semester: Complete reset with new class schedule, updated goals, and fresh decorative elements.
Mid-Semester: Adjust your system based on what’s working and what isn’t. Add exam prep sections or reorganize if your schedule has changed.
Seasonal Decor: Incorporate seasonal colors or themes—fall leaves in October, cozy winter vibes in December, fresh spring colors in March.
Weekly Maintenance: Set aside 10 minutes each Sunday to update your board for the week ahead. This prevents it from becoming outdated and useless.
Common Dorm Whiteboard Mistakes to Avoid
Learn from other students’ experiences and skip these common pitfalls:
Mistake #1: Overcrowding
Cramming too much information makes your board stressful to look at. Leave white space and prioritize what actually needs to be visible.
Mistake #2: No Color System
Using random colors for everything creates visual chaos. Establish a simple color code and stick to it.
Mistake #3: Forgetting to Update
An outdated whiteboard is worse than no whiteboard. Build updating into your weekly routine.
Mistake #4: Ignoring Lighting
Place your whiteboard where you’ll actually see it—near your desk, by the door, or in your line of sight when you wake up.
Mistake #5: Making It Too Complicated
Fancy layouts are great, but not if they take 30 minutes to update. Keep your system simple enough that you’ll actually maintain it.
Whiteboard Supplies Worth Having
While you don’t need expensive supplies, a few key items make a big difference:
- Quality Markers: Expo or similar brands erase cleanly and don’t ghost. Invest in a good set in your preferred colors.
- Fine-Tip Markers: Perfect for detailed work, small calendars, or writing in tight spaces.
- Bold/Chisel Tip: Best for headers, borders, and making important information stand out.
- Magnetic Accessories: If your board is magnetic, use small magnets to hold notes, photos, or reminders.
- Eraser and Cleaner: Keep both on hand. A microfiber cloth works great for deep cleaning.
- Washi Tape: Creates decorative borders, sections off areas, and adds color without permanent commitment.
- Stickers or Stencils: Add decorative elements quickly if you’re not confident in your drawing skills.
Making Your Whiteboard Instagram-Worthy
Let’s be real—having an aesthetic dorm whiteboard is fun, and you might want to share it on social media. Here’s how to make it photo-ready:
Lighting Matters: Natural light makes everything look better. Position your board near a window if possible, or take photos during golden hour.
Consistent Color Palette: Stick to 3-4 colors maximum for a cohesive look. This makes your board feel intentional rather than chaotic.
Add Texture: Incorporate fairy lights, dried flowers, fabric swatches, or textured paper elements around your board for visual interest.
Use Hand Lettering: Even simple calligraphy-style headers elevate your board. Practice on paper first, then transfer to the whiteboard.
Layer with Photos: Pin polaroids or printed photos around your whiteboard using washi tape or small clips. This adds personality and breaks up the monotony.
Roommate Whiteboard Etiquette
Sharing a dorm room means sharing whiteboard space. Keep these tips in mind:
Divide the Space: Clearly mark which sections belong to whom, or take turns using the board for different purposes.
Shared Calendar: Use one section for room-wide information—guests staying over, cleaning schedules, quiet hours.
Message System: Leave a designated area for notes to each other. This prevents sticky note chaos all over the room.
Respect Boundaries: Don’t erase your roommate’s important information without asking. When in doubt, communicate first.
Troubleshooting Common Whiteboard Problems
Problem: Ghosting (faint marks that won’t erase)
Solution: Use a magic eraser, whiteboard cleaner, or a tiny bit of rubbing alcohol on a cloth. Prevention: Don’t leave markers on the board for weeks.
Problem: Not enough space
Solution: Use smaller handwriting, abbreviate more, or add a second smaller board in a different location.
Problem: Markers keep drying out
Solution: Store them horizontally, recap immediately after use, and keep caps tight. Buy quality markers that last longer.
Problem: Board looks messy
Solution: Use rulers or washi tape to create straight lines and defined sections. Erase and redraw if needed.
Problem: Can’t stick to the system
Solution: Simplify your layout. Start with just the essentials and add complexity only if you’re actually using it consistently.
Your Dorm Whiteboard Checklist
Use this checklist to create or refresh your dorm whiteboard setup:
- □ Choose whiteboard size and location based on your space
- □ Select 3-4 main colors for your system
- □ Map out your class schedule
- □ List all major assignment due dates for the month
- □ Create a weekly or daily to-do section
- □ Add at least one motivational element (quote, photo, doodle)
- □ Establish a color-coding system
- □ Gather supplies: markers, eraser, washi tape, magnets
- □ Set up your board with clear sections
- □ Schedule weekly 10-minute update time
- □ Take a photo for inspiration (and maybe social media!)
- □ Share the system with your roommate if applicable
Frequently Asked Questions
What size whiteboard is best for a dorm room?
For most dorm rooms, a medium-sized board (17×23 inches or similar) works well. It’s large enough to be useful but doesn’t overwhelm small walls. If space is extremely limited, consider a door-mounted board or multiple smaller boards in different areas.
How do I hang a whiteboard without damaging dorm walls?
Use command strips, removable adhesive hooks, or over-the-door hangers. Most dorms prohibit nails and permanent mounting. Clear acrylic boards work especially well with command strips since they’re lightweight.
Can I use regular markers on a whiteboard?
No—always use dry-erase markers specifically designed for whiteboards. Regular permanent markers will stain the surface and be extremely difficult to remove. If you accidentally use permanent marker, try rubbing alcohol or a dry-erase marker over it to lift the stain.
How often should I update my dorm whiteboard?
Aim for a quick daily check and a more thorough weekly update (usually Sunday evenings work well). Update your schedule at the beginning of each semester and refresh decorative elements monthly or seasonally to keep it feeling fresh.
What if I’m not artistic or creative?
You don’t need to be artistic to have a great whiteboard! Use stencils for decorative elements, print and tape up quotes or calendars, stick to clean simple layouts, or focus purely on function with minimal decoration. Plenty of effective whiteboards are simple and straightforward.
Ready to Create Your Perfect Dorm Whiteboard?
Your dorm whiteboard is more than just a organizational tool—it’s a reflection of your personality, a stress-reduction system, and one of the easiest ways to make your temporary college space feel like home. Whether you choose a minimalist setup or go all-out with colors, doodles, and decorative elements, the best whiteboard is the one you’ll actually use consistently.
Start with the essentials, keep your system simple enough to maintain, and don’t be afraid to experiment until you find what works for your unique schedule and style. Remember, you can always erase and start over—that’s the beauty of whiteboards. Your setup in September might look completely different by January, and that’s perfectly normal.
Now that you’ve seen 25 different approaches and learned the principles behind effective dorm whiteboards, it’s time to create your own. Grab your markers, find your wall space, and build a command center that helps you crush this semester while making your dorm room feel uniquely yours.
Organized Monthly Calendar with Color-Coded Events

Source: Pinterest via Hunters Room Inspiration
This monthly calendar setup uses a soft neutral palette with clean lines to create a whiteboard that’s both functional and visually calming. The layout dedicates clear space for each date while leaving room for notes about assignments, social events, and deadlines. What makes this particularly effective for dorm life is the color-coding system—different colored markers indicate different types of commitments, making it easy to spot busy weeks at a glance.
The aesthetic appeal comes from the restrained color scheme and consistent handwriting style. Rather than cramming every available inch with information, this layout embraces white space, which prevents the board from feeling overwhelming. The neutral tones work well in any dorm room decor style and won’t clash with existing bedding, wall art, or furniture.
To adapt this for your space, start by drawing a simple grid with light pencil or a pale marker, then go over it with your chosen color. Use one color for classes, another for social events, and a third for deadlines. If you’re not confident in your freehand drawing, use a ruler or create a template on paper first. This setup works especially well if you update it monthly rather than weekly, giving you a bigger-picture view of your semester.
Daily Planning Board with Task Management System

Source: Pinterest via Vision Board 2025
This daily planning board breaks down your day into manageable chunks, making it ideal for students who feel overwhelmed by long to-do lists. The layout includes dedicated sections for different time blocks, priority tasks, and notes, creating a comprehensive view of both your schedule and your responsibilities. With over 17,000 saves, this format clearly resonates with students looking for structure.
The strength of this system lies in its flexibility. You can adjust the time blocks based on your actual schedule, add or remove sections as needed, and completely refresh it every morning or evening. The visual separation between different types of information prevents important details from getting lost in a sea of text.
To recreate this, divide your board horizontally into time slots that match your typical day. Add a priority section at the top for must-do items, and leave space at the bottom for notes or tomorrow’s preview. Use different colored markers for different categories—perhaps blue for classes, green for study time, and pink for personal activities. This works best if you commit to updating it daily as part of your routine.
Minimalist Office-Style Whiteboard for Study Space

Source: Pinterest via My Own Apartment
This office-inspired setup brings professional organization into your dorm study area. The clean lines and restrained design create a sophisticated look that elevates your space beyond typical college decor. With over 16,000 saves, this approach proves that simplicity and functionality win over flashy designs.
The board integrates seamlessly into a dedicated study zone, suggesting that placement matters as much as content. When your whiteboard lives in your primary work area, you’re more likely to reference it consistently and keep it updated. The neutral tones complement most desk setups without competing with other visual elements.
To adapt this for your dorm, position your whiteboard directly above or beside your desk where it’s in your line of sight while studying. Keep the layout simple—focus on your current week’s schedule, immediate deadlines, and daily tasks. Use a limited color palette (2-3 colors max) to maintain the clean aesthetic. This works especially well if you prefer a calm, uncluttered environment for focusing on coursework.
Artistic Whiteboard with Creative Layout Design

Source: Pinterest via Study Board
This whiteboard treats organization as an art form, blending functional information with creative visual elements. The layout demonstrates that your dorm whiteboard doesn’t have to choose between being useful and being beautiful—it can be both. With over 10,000 saves, this approach appeals to students who want their organizational tools to reflect their personality.
The design likely incorporates decorative borders, hand-lettered headers, or artistic flourishes that make checking your schedule feel less like a chore. These visual touches transform a basic whiteboard into a piece of functional wall art that happens to keep you organized.
To recreate this aesthetic, start with your functional layout, then add decorative elements around the edges or between sections. Try hand-lettering your headers in a fun font, adding simple doodles that relate to your classes (like a tiny book for literature or a beaker for chemistry), or using washi tape to create decorative borders. Even if you’re not naturally artistic, simple geometric patterns or consistent styling can elevate your board significantly.
Bedroom Whiteboard with To-Do List Integration

Source: Pinterest via College Room Decorations
This bedroom-focused whiteboard setup integrates seamlessly into your personal space, making it perfect for students who want organization without sacrificing the cozy, personal feel of their dorm room. The to-do list format keeps daily tasks visible and actionable, preventing important items from slipping through the cracks.
Positioning a whiteboard in your bedroom—rather than just at your desk—means you see it first thing in the morning and last thing at night. This constant visibility helps you start your day with clear priorities and end it with a sense of accomplishment as you check off completed tasks.
To make this work in your dorm, choose a spot where you’ll naturally see it: above your desk, on the back of your door, or on a wall you face while getting ready. Create a simple to-do list format with checkboxes, and consider adding a “tomorrow” section so you can plan ahead. Keep it updated each evening for the next day. The key is making it easy enough that you’ll actually maintain it consistently.
Kanban-Style Task Board for Project Management

Source: Pinterest via College Board Ideas
This kanban-style board brings professional project management into your dorm room. By dividing tasks into columns like “To Do,” “In Progress,” and “Done,” you create a visual workflow that shows not just what you need to do, but where each task stands. This is particularly helpful for managing long-term projects, studying for multiple exams, or juggling several classes simultaneously.
The system’s power comes from its visual nature—you can instantly see if you have too many things “In Progress” or if your “To Do” column is getting overwhelming. This makes it easier to prioritize and prevents the common student problem of starting too many things without finishing anything.
To set this up, divide your board vertically into three or four columns. Label them with stages that make sense for your workflow (To Do, Studying, Review, Complete, for example). Write individual tasks on the board or use sticky notes if you want extra flexibility. Move items across columns as you progress. This works especially well for visual learners and students managing complex semester projects.
Weekly Tracker with Aesthetic Design Elements

Source: Pinterest via Organized Whiteboard Ideas
This weekly tracker combines practical organization with aesthetic appeal, creating a whiteboard that’s genuinely pleasing to look at while keeping you on track. The layout dedicates space to each day of the week while incorporating design elements that make the board feel intentional rather than purely utilitarian.
The tracker format is particularly useful for habit building, tracking study hours, monitoring assignment progress, or keeping tabs on recurring weekly commitments. Seeing a full week at once helps you spot patterns—like which days are consistently overloaded or when you have the most available study time.
To create your own weekly tracker, draw seven columns (one for each day) and however many rows you need for different categories (classes, study time, meals, exercise, etc.). Use consistent colors for each category to make the board easy to read at a glance. Add decorative elements like small icons, washi tape borders, or hand-drawn details to personalize it. Update it every Sunday evening for the week ahead.
Household Schedule and Routine Whiteboard

Source: Pinterest via Small Space Ideas
This schedule-focused whiteboard tackles one of dorm life’s trickiest challenges: keeping up with cleaning and daily routines while managing a heavy academic load. By making chores and routines visible, you’re more likely to actually do them, preventing the slow accumulation of mess that can make a small dorm room feel even smaller.
The layout likely includes recurring tasks organized by day or week, making it clear what needs to happen when. This is especially valuable if you’re sharing a room, as it creates accountability and prevents the “I thought you were doing that” conversations with your roommate.
To adapt this for your dorm, create sections for daily tasks (make bed, clear desk), weekly tasks (laundry, vacuum, change sheets), and monthly tasks (deep clean, organize closet). Use checkboxes so you can mark completion, and consider color-coding by roommate if you’re sharing responsibilities. Keep the board in a high-traffic area like near the door or above your desk for maximum visibility.
Combined Whiteboard and Pin Board Organizer

Source: Pinterest via Dorm Inspo
This hybrid setup combines a whiteboard with a pin board (or cork board), giving you the best of both worlds. The whiteboard handles time-sensitive information that changes frequently—your schedule, daily tasks, upcoming deadlines—while the pin board holds more permanent items like photos, inspiration, important papers, or decorative elements.
This dual approach is particularly smart for dorm rooms where wall space is at a premium. Instead of choosing between a whiteboard and a bulletin board, you get both functions in one cohesive setup. The combination also creates visual variety, preventing your organizational system from feeling monotonous.
To recreate this, you can buy a combo board or mount a small whiteboard and cork board side by side. Use the whiteboard for your schedule, to-do lists, and weekly planning. Reserve the pin board for photos, motivational quotes printed on cardstock, business cards, tickets from events, or other mementos you want to display. This works well if you like having both functional organization and personal decoration in your space.
September Calendar Whiteboard for Semester Start

Source: Pinterest via Study or Die
This September-focused calendar is perfect for kickstarting your fall semester with organization and intention. Starting fresh with a new month and a new academic term gives you the opportunity to establish good habits from day one, and a dedicated calendar whiteboard sets the foundation for staying on track all semester.
The monthly view is ideal for seeing the big picture—midterm dates, major project deadlines, holidays, and social events all become visible at once. This helps you avoid the common freshman mistake of underestimating how quickly the semester moves or overcommitting during what seems like a light week.
To create your own semester-start calendar, begin by marking all fixed dates: first day of classes, holidays, known exam dates, and major assignment deadlines from your syllabi. Then add recurring commitments like club meetings or work shifts. Leave space to add new items as the semester progresses. Use different colors for academic, social, and personal commitments. Update it at the start of each month with fresh details.
Accountability Board for Work and Study Balance

Source: Pinterest via Organization Ideas
This accountability-focused whiteboard helps you balance the competing demands of coursework, part-time work, and personal life. By making your commitments visible, you create a reality check that prevents overcommitting and helps you see when you’re spreading yourself too thin.
The board likely includes sections for different areas of responsibility—classes, work shifts, study time, personal commitments—allowing you to see how everything fits together. This holistic view is crucial for students juggling multiple responsibilities, as it reveals conflicts before they become crises.
To build your own accountability board, create sections for each major area of your life. List your fixed commitments first (class times, work schedule), then add flexible items (study blocks, assignment work time). Be realistic about how long things actually take—don’t just write “study chemistry,” block out specific 2-hour chunks. Review your board weekly to ensure you’re allocating enough time for everything that matters.
Motivational Quote Whiteboard for Daily Inspiration

Source: Pinterest via Strong Girls
This quote-focused whiteboard prioritizes motivation and mindset alongside practical organization. College can be stressful, and seeing an encouraging message every day provides a small but meaningful boost to your mental health and determination. The format shows that whiteboards don’t have to be purely functional—they can nurture your emotional well-being too.
The teacher-style format suggests clean, readable lettering that makes the quote the star of the show. This approach works well for students who respond to daily affirmations or need regular reminders to stay focused on their goals during challenging weeks.
To create your own motivational whiteboard, choose quotes that genuinely resonate with you—not just pretty words, but messages that speak to your specific challenges and aspirations. Change the quote weekly or whenever you need a fresh perspective. You can combine this with practical elements by dedicating one section to your quote and another to your schedule, or rotate between motivational content and organizational content based on what you need most.
Decorative Wall Calendar with Reusable Design

Source: Pinterest via College Apartment
This decorative wall calendar combines functionality with aesthetic appeal, creating a whiteboard that serves as both an organizational tool and a design element in your dorm room. The reusable nature means you can update it monthly or semester-by-semester without starting from scratch, making it a sustainable choice for long-term use.
The calendar format provides structure while the decorative elements—whether that’s color choices, borders, or artistic details—make it feel personalized and intentional. This is perfect for students who want their organizational tools to contribute to their room’s overall vibe rather than detract from it.
To recreate this, start with a clean calendar grid layout, then add decorative touches that match your room’s aesthetic. Consider using your school colors, your favorite color palette, or seasonal themes. Add small decorative elements like flowers, stars, or geometric patterns in the corners or between dates. Use this for monthly planning, and keep a separate smaller board for daily tasks if needed.
Creative Drawing Whiteboard with Cute Illustrations

Source: Pinterest via Drawings Board
This playful whiteboard proves that organization doesn’t have to be serious all the time. Featuring cute cat illustrations and creative drawings alongside functional information, this setup brings joy and personality to your dorm space. It’s perfect for students who want their whiteboard to reflect their interests and sense of humor.
The artistic elements make the board more engaging to look at, which means you’re more likely to actually check it regularly. Plus, adding drawings or doodles can be a stress-relieving activity during intense study sessions—a quick creative break that still keeps you in your workspace.
To add artistic elements to your own board, start simple: draw small icons next to different types of commitments (a coffee cup for morning classes, a moon for evening study sessions, hearts for social events). If you’re not confident in your drawing skills, use stencils, trace simple shapes, or practice on paper first. Even basic doodles add personality. You could also dedicate a corner of your board to rotating drawings or leave space for spontaneous creative expression.
Spring-Themed Calendar with Seasonal Inspiration

Source: Pinterest via Motivation Board
This spring-themed calendar demonstrates how seasonal updates can keep your whiteboard feeling fresh and exciting throughout the year. By incorporating seasonal colors, motifs, or themes, you create a whiteboard that evolves with the calendar, preventing it from becoming stale or ignored.
Spring themes might include pastel colors, floral elements, renewal and goal-setting messages, or lighter, brighter aesthetics that match the season’s energy. This is particularly motivating during spring semester when the end of the academic year is in sight but finals still feel far away.
To create seasonal whiteboards, plan to refresh your design at the start of each season or semester. For spring, try soft pinks, greens, and yellows; add simple flower doodles; or write goals related to finishing the semester strong. Summer could feature bright colors and vacation planning. Fall might incorporate warm tones and back-to-school energy. Winter could focus on cozy aesthetics and year-end goals. This keeps your board interesting and gives you a regular opportunity to reassess your organizational system.
November Calendar for Fall Semester Organization

Source: Pinterest via Future House
This November calendar is strategically timed for one of the most challenging months of fall semester—when midterm stress is fading but finals are approaching, and the novelty of the new school year has worn off. Having a clear visual of what’s coming helps you prepare mentally and academically for the final push.
November often includes Thanksgiving break, which can be a double-edged sword: a chance to rest, but also a potential time-sink if you don’t plan study time around it. A dedicated calendar helps you see exactly how much time you have before finals and plan accordingly.
For your November board, mark all remaining major deadlines, finals dates, and the Thanksgiving break period. Be strategic about when you’ll study during the break if you’re going home. Use this calendar to prevent the common mistake of assuming you have more time than you actually do. Add self-care reminders too—November can be stressful, and seeing “take a break” or “call home” on your calendar is a healthy reminder to maintain balance.
Interactive Question Whiteboard for Dorm Door

Source: Pinterest via College Whiteboard Ideas
This interactive door whiteboard transforms your dorm room entrance into a social hub. By posting fun questions that neighbors can answer directly on the board, you create low-pressure opportunities for connection and conversation. This is especially valuable for freshmen looking to meet people or for building community on your floor.
Questions might range from silly (“What’s your favorite snack?”) to thought-provoking (“What’s the best concert you’ve been to?”) to practical (“What’s your go-to study spot?”). The variety keeps things interesting and gives different people different ways to engage.
To create your own interactive door board, choose a question that’s easy to answer and broadly appealing. Change it weekly to keep things fresh. Provide markers nearby (attach them with string so they don’t disappear). Make sure your question is appropriate for a public space and inclusive of different backgrounds. This works especially well during move-in week, before breaks, or anytime you want to meet more people on your floor.
February Goals Board with Valentine’s Theme

Source: Pinterest via Organization Board
This February-focused board combines goal-setting with seasonal theming, creating a whiteboard that’s both practical and festive. February can be a challenging month—winter is long, spring break feels far away, and the new-year motivation has faded. A fresh board with Valentine’s colors and renewed goals helps combat the mid-semester slump.
The setup likely includes both organizational elements (schedule, tasks) and motivational components (goals, affirmations), showing that you don’t have to choose between function and inspiration. The Valentine’s theme—perhaps featuring pinks, reds, hearts, or self-love messages—adds personality without sacrificing usefulness.
To create your own February board, use pink and red markers for a Valentine’s aesthetic, or focus on “self-love” themes with goals around taking care of yourself during a stressful semester. Include both academic goals (finish that paper, study for midterms) and personal goals (call a friend, try a new recipe, get enough sleep). This balanced approach acknowledges that college success isn’t just about grades—it’s about overall well-being.
Dorm Door Whiteboard with Conversation Starters

Source: Pinterest via UVA Dorm
This UVA dorm door whiteboard exemplifies how a simple setup can foster community in college housing. Door whiteboards are uniquely positioned to create interactions because they’re visible to everyone on your floor, not just you and your roommate. They turn your door into a mini social platform.
The question format invites participation without requiring it, making it low-pressure for both you and your neighbors. People can stop and answer when they pass by, creating natural conversation starters that don’t feel forced or awkward.
To maximize your door whiteboard’s impact, place it at eye level where it’s easily readable. Change questions regularly to maintain interest. Consider timing—ask about weekend plans on Monday, favorite Thanksgiving dishes in November, or New Year’s resolutions in January. Keep markers accessible but secure them so they don’t walk away. This works especially well if you’re an RA trying to build floor community or if you’re new to campus and want to meet people.
Funny and Creative Whiteboard with Playful Design

Source: Pinterest via College Whiteboard Ideas
This playful whiteboard featuring fish and creative elements demonstrates that your dorm organization system doesn’t have to be boring or overly serious. Injecting humor and personality into your whiteboard makes it more enjoyable to use and can actually improve your mood during stressful study sessions.
The fish theme and fun design choices show that whiteboards can be a form of self-expression, not just a tool. This is particularly valuable in dorm rooms where you have limited ability to personalize your space through traditional decor.
To add humor and creativity to your own board, incorporate inside jokes, draw silly characters, write funny reminders (“yes, you do need to do laundry”), or create puns related to your classes. Use bright, unexpected color combinations. Let your board reflect your actual personality rather than an Instagram-perfect aesthetic. The goal is creating something that makes you smile while still keeping you organized—these aren’t mutually exclusive.
Miffy-Themed Cute Whiteboard Design

Source: Pinterest via Organizacja
This Miffy-themed whiteboard shows how incorporating beloved characters or specific aesthetic themes can make your organizational system feel more personal and enjoyable. The cute design likely features the simple, minimalist style associated with Miffy, creating a board that’s both functional and adorable.
Character-themed or aesthetic-specific whiteboards work well for students who have strong visual preferences or who find that cute designs motivate them to stay organized. When your board aligns with your personal taste, you’re more likely to engage with it consistently.
To create a themed whiteboard, choose a character, aesthetic, or style you love—whether that’s Miffy, Sanrio characters, cottagecore, minimalist Scandinavian design, or something else entirely. Incorporate visual elements from that theme through drawings, color choices, or decorative details. You can find tutorials online for drawing popular characters, or use stencils if you’re not confident in your freehand skills. The key is making the theme enhance the functionality, not overshadow it.
Colorful Question Board with Fun Prompts

Source: Pinterest via College Board Inspo
This vibrant, colorful question board uses bright colors and engaging prompts to create an inviting, energetic vibe. The use of multiple colors makes the board visually interesting and helps different sections or questions stand out from each other.
The colorful approach is particularly effective for catching attention—whether it’s your own attention when you need to check your schedule or a neighbor’s attention when they’re walking down the hall. Color psychology suggests that bright, varied hues can boost mood and energy, which is helpful during long study sessions or stressful weeks.
To create a colorful board like this, invest in a variety of marker colors and use them intentionally. Assign different colors to different types of information, or just embrace a rainbow aesthetic that makes you happy. Don’t be afraid to use bold, bright combinations. If you’re worried about it looking chaotic, maintain some structure—consistent handwriting, clear sections, or a cohesive layout—while going wild with color choices.
Funny Poll Whiteboard for Dorm Engagement

Source: Pinterest via College Whiteboard Inspo
This poll-style whiteboard takes interaction to the next level by asking neighbors to vote on funny or interesting questions. Instead of just answering open-ended questions, people can add tally marks or their names under different options, creating a visual representation of floor opinions.
Polls are particularly engaging because they’re quick to participate in (just add a tally mark) and create natural conversation topics (“I can’t believe pizza won over tacos!”). They also build a sense of community as people see what their neighbors think about various topics.
To create effective poll boards, ask questions with clear answer options. Good poll questions are lighthearted, inclusive, and easy to understand at a glance. Examples: “Coffee or energy drinks?” “Beach vacation or mountain cabin?” “Morning person or night owl?” Provide space for tally marks or names under each option. Change polls weekly to keep things fresh. This works especially well during move-in week or before major campus events.
Creative Office-Style Whiteboard with Encouraging Signs

Source: Pinterest via The White Board
This creative whiteboard blends professional organization with personal encouragement, creating a setup that’s both functional and emotionally supportive. The inclusion of encouraging signs or messages acknowledges that college is challenging and that students need motivation alongside their schedules.
The office-style aesthetic suggests clean lines, professional organization, and a mature approach to productivity—perfect for students who want to treat their studies like a serious professional commitment. But the encouraging elements prevent it from feeling cold or corporate.
To balance professionalism with encouragement, use a clean, organized layout for your schedule and tasks, then add motivational elements in strategic places. Write “You’ve got this!” next to a big exam date, or “Proud of you” as a general message. Use professional-looking handwriting or lettering for the functional parts, and add more playful, personal touches for the encouraging messages. This approach works well for graduate students, pre-professional programs, or anyone who wants to maintain high standards while being kind to themselves.
Funny “Favorite Form of Potato” Question Board

Source: Pinterest via Dorm Whiteboard
This delightfully silly “Favorite Form of Potato?” question exemplifies the kind of low-stakes, universally relatable prompt that makes dorm door whiteboards so effective. It’s funny without being exclusionary, easy to answer, and likely to spark conversations about favorite foods, comfort meals, or dining hall opinions.
The humor in this approach is strategic: it makes your door approachable, shows you don’t take yourself too seriously, and gives people an easy way to connect. Not everyone feels comfortable answering deep or personal questions, but almost everyone has an opinion about fries versus mashed potatoes.
To create your own funny, accessible questions, think about universal experiences that vary from person to person: favorite snacks, sleep schedules, study habits, coffee orders, or campus opinions. Keep questions light and positive. Avoid anything that could be divisive or make people uncomfortable. The goal is creating easy connection opportunities, not starting debates. Change questions regularly, and don’t be surprised if a particularly good question gets responses from people you haven’t met yet—that’s the whole point!
Love these dorm whiteboard ideas? Follow quinnhomedecorideas on Pinterest for more college dorm organization, aesthetic room setups, and student life inspiration!

